
Make it so. file1 -> Makefile -> file2
25 Feb 2017Intro
make-it-so is an old package of mine that I haven't yet highlighted on the blog. This package helps you manage a collection of makefiles that are used to generate new files from existing files using shell commands.
You can think of these makefiles as a directory of shell functions, arranged by the extension of the files that they operate on:
$ cd make-it-so && find recipes -name Makefile
recipes/ipynb/to-md/Makefile
recipes/ogv/crop/Makefile
recipes/ogv/trim/Makefile
recipes/ogv/to-gif/Makefile
recipes/pdf/to-txt/Makefile
recipes/md/to-org/Makefile
recipes/md/to-html/Makefile
recipes/cue/split/Makefile
recipes/dot/to-png/Makefile
recipes/m4a/to-mp3/Makefile
recipes/flac/to-mp3/Makefile
recipes/gif/gifsicle/Makefile
recipes/svg/to-png/Makefile
recipes/chm/to-pdf/Makefile
recipes/txt/encode-utf8/Makefile
recipes/mp4/to-mp3/Makefile
recipes/mp4/trim/Makefile
recipes/mp4/replace-audio/Makefile
recipes/png/to-gif/Makefile
When you call make-it-so on a particular file, you get completion
for the recipes that are available for that file extension, along with
an option to create a new recipe.
Example 1: convert pdf to txt
Suppose you want to convert a PDF file test.pdf to a text file test.txt.
In case the recipe is in your collection, you don't have to remember the command or the command switches to do it anymore:
- Navigate to
test.pdfindiredand press , (bound tomake-it-so). - Select the recipe you want using completion:
to-txtis already provided. Your file and the makefile recipe are moved to the staging area:
./to-txt_test.pdf/test.pdf
./to-txt_test.pdf/Makefile
The makefile is opened in a new buffer with the following bindings:
- f5 (
mis-save-and-compile) will runcompile, creatingtest.txtin the current directory. - C-, (
mis-finalize) will finalize the operation, movingtest.pdfandtest.txtto the parent directory (wheretest.pdfwas before), and deleting the staging directory. - C-M-, (
mis-abort) will movetest.pdfback to its initial location and delete all generated files. This command is effectively anundoformake-it-so.
- f5 (
It takes a large chunk of text to describe everything, but the key sequence for doing all this is quite short:
- , -
make-it-so. - RET - select
to-txt. - f5 - create
test.txt. - C-, - finalize.
Example 2: make a gif from a series of png images
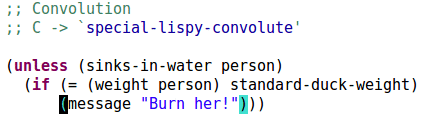
I'll describe the process of creating a high quality gif like this one, which describes the effect of the C key in lispy:
First, I use kazam to take two png
screenshots of my Emacs screen:
$ ls -1 *.png
Screenshot 2017-02-25 16:14:49.png
Screenshot 2017-02-25 16:15:10.png
I plan to use gifsicle to sequence
the still images into a gif. But it only takes gif as the input
format, so first I have to convert my png files to non-animated
gif files.
I open the dired buffer where they are located and mark them with
m (dired-mark). Then call make-it-so with ,
and select to-gif recipe. This recipe has no parameters, so there's
nothing else to do but f5 C-,. Two new files are created:
$ ls -1 *.png *.gif
Screenshot_2017-02-25 16:14:49.gif
Screenshot_2017-02-25 16:14:49.png
Screenshot_2017-02-25 16:15:10.gif
Screenshot_2017-02-25 16:15:10.png
Note that the file names (the defaults of kazam) are problematic
when used with makefiles, since they contain spaces and colons. The
Elisp layer of make-it-so takes care of that. It renames the files
back and forth so that the logic in the makefiles remains simple.
Next, I mark the two gif files using *%
(dired-mark-files-regexp), press , once more and select
the gifsicle recipe. I'm presented a makefile with the following
contents:
# ——— parameters —————————————————————————————————

# delay between frames in hundredths of a second
delay = 60

# ——— implementation —————————————————————————————
DIRGIF = $(shell ls *.gif | grep -v anime.gif)

all: anime.gif

anime.gif: Makefile $(DIRGIF)
    rm -f anime.gif
    gifsicle --delay=$(delay) --colors=256 --loop $(DIRGIF) > $@
    echo $@ >> provide

clean:
    rm -f anime.gif provide

install-tools:
    sudo apt-get install gifsicle

.PHONY: all install-tools clean
The most commonly useful parameter, the delay between frames, is
nicely documented at the top. I don't have to remember that the switch
name is --delay or that the switch style --delay=60 is used. I
simply change the number above until I get the result that I want.
Example 3: add a new recipe
As a sample scenario, assume you want to convert *.svg to *.png.
Step 1
An internet search leads to Stack Overflow and this command:
inkscape -z -e test.png -w 1024 -h 1024 test.svg
Navigate to the file(s) in dired and call make-it-so with
,. No default actions are available, so just type "to-png"
and hit RET. The "to-" prefix signifies that this is a
conversion, adapting the Makefile to this form:
# This is a template for the Makefile.
# Parameters should go in the upper half as:
#     width = 200
# and be referenced in the command as $(width)

# ____________________________________________

DIRSVG = $(shell dir *.svg)

DIRPNG = $(DIRSVG:.svg=.png)

all: clean Makefile $(DIRPNG)

%.png: %.svg
    echo "add command here"
    echo $@ >> provide

clean:
    rm -f *.png provide

# Insert the install command here.
# e.g. sudo apt-get install ffmpeg
install-tools:
    echo "No tools required"

.PHONY: all install-tools clean
If the action name doesn't have a "to-" prefix, the transformation is assumed to be e.g. "svg" -> "out.svg". You can change this of course by editing the Makefile.
Step 2
In case the command needs additional packages in order to work you
might want to change echo "No tools required" to the appropriate
package install instruction, e.g. sudo apt-get install inkscape.
When you're on a new system, this will serve as a reminder of what you should install in order for the Makefile to work. Simply call:
make install-tools
Step 3
Replace echo "add command here" with:
inkscape -z -e $@ -w $(width) -h $(height) $^
The parameters
widthandheightwill go to the top of the Makefile, where they can be customized.$@refers to the output file,test.pngin this case.$^refers to the input file,test.svgin this case.
That's it. You can see the final
Makefile here.
Test if the command works with f5 from the Makefile. If
you're happy with it, call mis-finalize with C-, from
dired. The Makefile will be saved for all future calls to
make-it-so.
Outro
To summarize the advantages of make-it-so:
- Write the recipe one time, never have to look up how to do the same thing a few months from now.
- A chance to write the recipe zero times, if someone in the community has already done it and shared the recipe with you.
- The Elisp layer takes care of hairy file names.
- Parallel commands on multiple files, i.e.
make -j8, are provided for free.
The most important usage tip: until you're sure that the command and the Makefile work properly make backups. In fact, make backups period. Happy hacking!